Hello Friends,
Apologies for being missing in action last week. My weekend was filled with pounding the pavement for the St Luke's Midnight Walk I walked 13 miles in 3 hours 35 minuets and raised over £80 for the charity. It was such a buzz to finish.
So in the crafty news I am still working on that doily for my friends birthday, I forgot how long lace work takes, I think she'll be getting and IOU for 1 doily on her birthday.
As always I have been distracted by another new craft. I have recently been making Kanzashi flowers.
They are so pretty and addictive to make.There are a lot of good tutorials around to fold your perfect petal. My favorites are:
Little Birdie Secrets tutorial for the pointed petal
and
This one form cut out and keep for rounded petals.
See Easy Kanzashi Flower and 1000's of others - or share your own on Cut Out + Keep
I have put all of the flowers I have made so far on Maggie Makes Stuff along with some 5 strand braided head bands I made.
And last but not least I have cast on my Ravellenic project today, for the synchronised stash busting event. I have a big bag full of all my nasty synthetic novelty yarn and I'm using the giant knitting needles to make it into a rug. Its looking pretty good so far as all the colours are complementing each other and it's really fluffy.
I'm knitting with about 11 strands of yarn and one it's done my nieces' will be playing with it.
TTFN friends, keep crafting
Sunday, 29 July 2012
Saturday, 14 July 2012
Weekly Update
Hello Friends,
Well the Fox is now very well
dressed with evening gown, cardigan, skirt and two pairs of shoes and off to
it’s new loving owner. That little fox was very popular with the ladies at
stitch and bitch, may have caused a bit of brooding.
Progress has halted on the
hexagon patchwork due to inconsiderate people having birthdays, lol, but I hope
to get some more of this done soon.
Hexipuffs: My begging for left over sock yarn has paid off. One of the lovely ladies at stitch and bitch gave me some sock yarn which has spurred me to get hexipuffing again. So far the total is up to 14. I'm going to take them away with me on a trip in August so I'll get loads more done then.
Crochet doily: I’m currently
working on a doily in a rich purple crochet cotton. It is intended to be a Birthday present for a friend, I wasn't sure if she would like it though so ended up telling her what I was up to. Turns out she loves doilies. So glad I asked, saved me worrying about it. The pattern is from ravelry coffee table topper by Agnes Russell.
I mentioned ages ago working on
a slouch hat with hearts on it, I think I am going to frog this one as I havn’t
worked on it in ages and I’m sure the moths are having a feast on it so it’s
best it gets ripped out and sealed in the yarn stash.
Journaling: I still currently
have two pages for my creative journal but with being a busy bunny I have not
had the time to make further pages though I have been pinning lots of beautiful
pages for inspiration and making notes of ideas for the next pages.
So much craft, so little time. There are so many things on my crafty wish list at the moment;
Weaving, after my failed
attempt at weaving a rug I have decided not to give up entirely on weaving,
there have been a few tutorials on pintrest and cut out and keep for weaving
with newspaper or magazines to make bowels etc and also an interesting
technique for weaving a quilt out of flat strips of fabric, of course I cant
try that until my god damn sewing machine gets fixed. I like this tutorial because of the unusual shape of the bowl it's made:
I have been wanting to do some
fabric covered books or a while, I have a craft encyclopaedia that would look
awesome covered and I could cover some diaries and note books and put them on
Maggie makes stuff as matching sets with pretty button and ribbon details :)
Needle felting, for some reason
I really want to try needle felting now. There are some really good beginner’s
kits online like ebay and Blooming Felt which look great and not to expensive. There are lots of cool things to do like making 2D pictures or 3D objects like
animals etc, you can felt directly onto clothing and use things like cookie
cutters to make nice neat shapes. I feel I may be buying a kit soon to add to
the many crafts that I already do.
Anyway I hope you enjoyed this weeks crafty rant.
see ya'll soon
Saturday, 7 July 2012
Weekly Update
Hi Friends,
Well it's been a crafty week. I have been busy making lots of presents for people. The fern cowl turned out really well.
As I was using a chunky wool I stopped half way in the lace pattern so that it wouldn't be to long, I was worried when I finished it as it wasn't sitting very nicely but after blocking it's perfect. I am going to give it to the birthday girl today. Very excited.
I have also been working on my niece's birthday present. I was looking for a doll that I could make clothes for so she could play dress up but couldn't find a doll that wasn't hideously expensive or hideously ugly so I got a stuffed animal instead.
So far this cute fox has an evening dress (blue and sparkly one) a cardigan, a skirt and a shoe. I am yet to make the other shoe. I'm pleased with the cardigan as I have been looking for a project to use this cute rainbow yarn in for ages.
I have lots more to make over the next few weeks as I have two more birthdays to make for, Busy busy busy.
Another thing I have been working on this week is my new facebook page Maggie Makes Stuff. I've had all my stock from craft fairs just sitting at home not doing anything so I decided to put them all on a facebook page so everyone can see what I have. I'm looking forward to making a few other bit's and pieces so I'll keep you updated on what's new. Go on take a look, have a browse and don't forget to click like :)
Saturday, 30 June 2012
Weekly Update
Greetings Friends,
I hope you have enjoyed my no sew cowl tutorial, I had been wearing mine loads.
So in the continuing saga of the broken sewing machine, I am useless and still haven’t organised a box to send it to the manufacturers. Bad Maggie! It’s very frustrating not having it available to play with so my priority for this weekend is box hunting.
This is the cover of my journal and I'm looking forward to making more pages.
I hope you have enjoyed my no sew cowl tutorial, I had been wearing mine loads.
So in the continuing saga of the broken sewing machine, I am useless and still haven’t organised a box to send it to the manufacturers. Bad Maggie! It’s very frustrating not having it available to play with so my priority for this weekend is box hunting.
A few birthdays are coming up so I’ve been whipping up a few projects.
My partners mum was thrilled with the Bias Blanket I knitted and it now takes
pride of place on her sofa. I’m currently crocheting a lacy cowl from Inside
Crochet for a friend’s birthday.
I am doing it in a brushed chunky grey yarn. She’s so stylish I knew she would like
something original and she loves statement looks. It’s also my niece’s birthday coming up so I plan to get a
doll for her and crochet a bunch of outfits for it so she can play dress up.
The hexagon patchwork is coming along slowly I have now joined two rows
together and taken the card out of some to make it easier to work with.
As usual I have been distracted by another new craft and I have started
a creative journal/smash book/art journal. I was inspired by the likes of Teesha Moore. She makes
amazing patchwork journal covers and has videos on youtube of how you can make
them yourself. The journal pages are also amazing, lots of lovely colours
textures and layers. So far I have done two pages and very much enjoying it.
Saturday, 23 June 2012
No Sew Cowl Tutorial
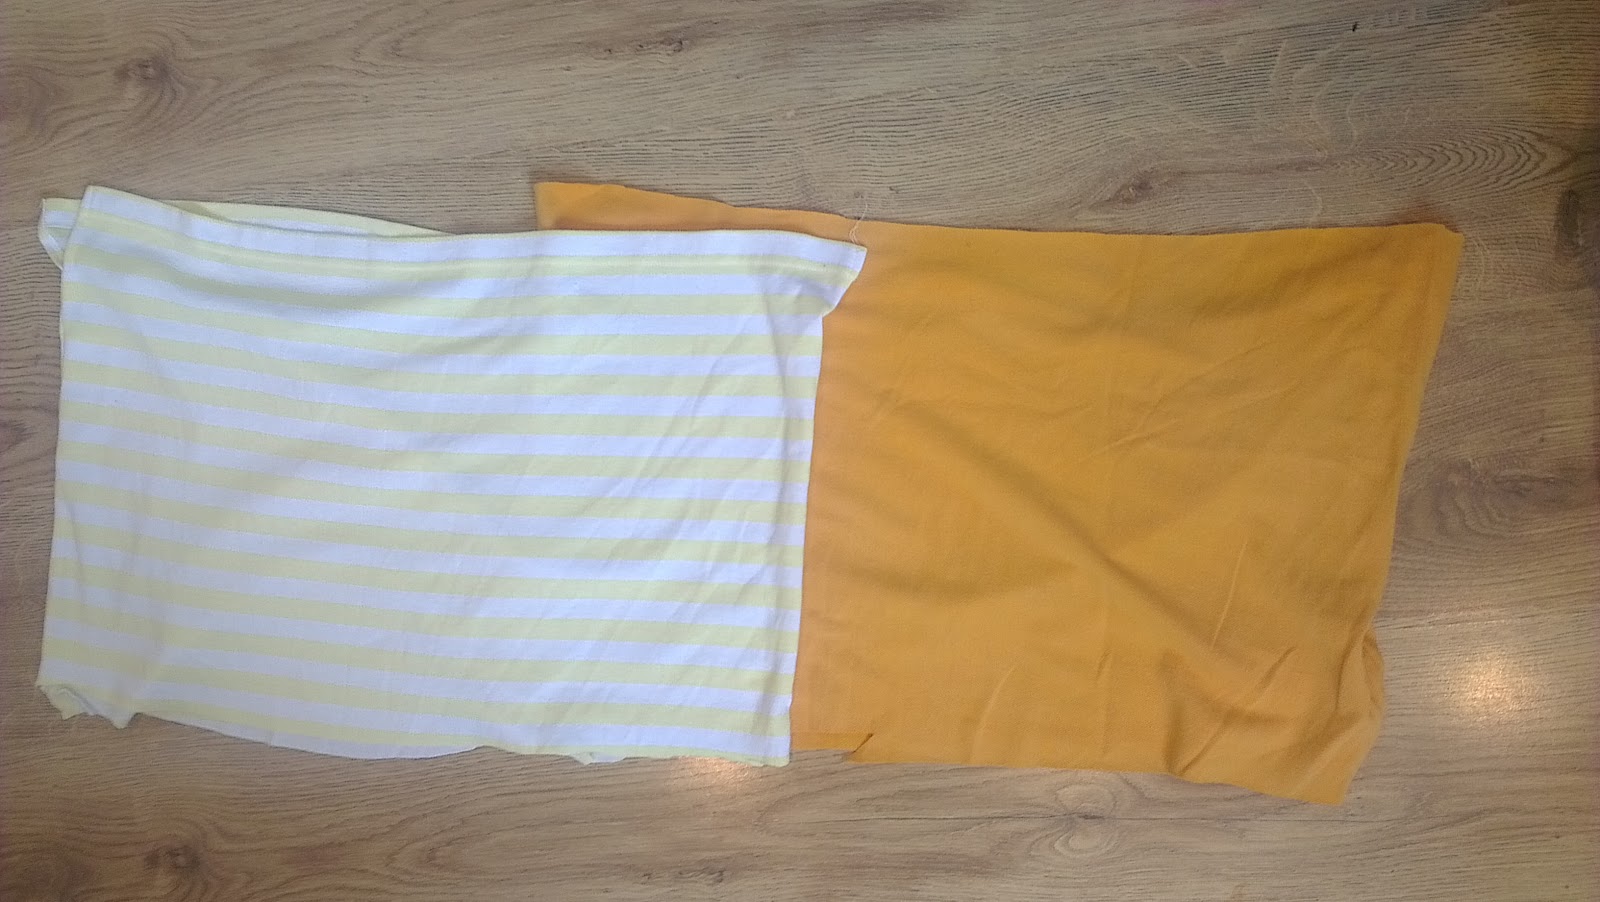
So with the devastation of the broken sewing machine I have been forced to think more creatively about some of my crafting. So here is a tutorial I whipped up for a super easy no sew t-shirt cowl.
You will need:
2 T-shirts
Scissors
a large crochet hook (between 5 and 8mm)
1.Take your t-shirts and cut off the bottom edge and cut across under the arms so you have two tubes.
2. Cut out the side seams so you have 4 rectangles of roughly the same size.
3. put all the pieces together lining up the short edges and cuts about 2cm deep and 3cm apart (this does not need to be accurate) on both sides, make sure you have the same number of cuts on both sides
4. Cut a small hole in the middle of each flap
5.Lay two pieces of fabric side by side. Put crochet hook through the bottom hole of the left hand piece of fabric and through the bottom hole of the right hand piece of fabric. Take the loop from the left side and bring it over the right side loop. Pick up the next loop on the left side and bring the right side loop over that.
6. Repeat the process to join the fabrics in a plat effect. Repeat with all of the pieces of fabric and join in a loop.
This make a very long cowl, it goes around my neck 3 times comfortably, feel free to to amend the pattern to make it shorter if you wish and enjoy.
You will need:
2 T-shirts
Scissors
a large crochet hook (between 5 and 8mm)
1.Take your t-shirts and cut off the bottom edge and cut across under the arms so you have two tubes.2. Cut out the side seams so you have 4 rectangles of roughly the same size.
3. put all the pieces together lining up the short edges and cuts about 2cm deep and 3cm apart (this does not need to be accurate) on both sides, make sure you have the same number of cuts on both sides
4. Cut a small hole in the middle of each flap
6. Repeat the process to join the fabrics in a plat effect. Repeat with all of the pieces of fabric and join in a loop.
This make a very long cowl, it goes around my neck 3 times comfortably, feel free to to amend the pattern to make it shorter if you wish and enjoy.
Saturday, 9 June 2012
Weekly Update
Hello Friends,
I hope you have enjoyed the cloud pattern last week. Devastation has struck this week, I was happily sewing away on my lovely new sewing machine that I got in March when it jammed and the needle snapped, now it will not work at all. I guess that is the problem with fancy computerized sewing machines, the more they can do the more can go wrong with them. So I called the company I bought it from as I have a guarantee and they said they will not insure the machine in transit unless it is in the original packaging (which I do not have) they offered to sell me the packaging but they don't have it in stock so not I need to arrange my own packaging and courier to take the machine to be fixed. Sigh! moral of the storey, read the small print, keep the packaging.
So just before my machine broke I did manage to whip up a few cool things. I made a reusable sandwich wrap with some oil cloth fabric I had. Here is the tutorial that I found on Pinterest from smashed peas and carrots
Inspired by a phone cover on pinterest. I think my new phone is soon going to have a better wardrobe than me.
Works in Progress
The hexagon patchwork is coming along very well. I drew up a schematic for how it was all going to be laid out
Then I laid it all out and taped it together:
I have now started sewing together the flower shapes into the rows then sewing the rows together. It's going to be a long process but totally worth it in the end.
I have also started knitting a top by purlbee. I was going to buy some merino yarn to make it but thankfully managed to save myself some money by getting a cotton jumper at a charity shop for 99p and ripping it out, so now I have some lovely cotton yarn to knit with.
Much Love
Maggie
I hope you have enjoyed the cloud pattern last week. Devastation has struck this week, I was happily sewing away on my lovely new sewing machine that I got in March when it jammed and the needle snapped, now it will not work at all. I guess that is the problem with fancy computerized sewing machines, the more they can do the more can go wrong with them. So I called the company I bought it from as I have a guarantee and they said they will not insure the machine in transit unless it is in the original packaging (which I do not have) they offered to sell me the packaging but they don't have it in stock so not I need to arrange my own packaging and courier to take the machine to be fixed. Sigh! moral of the storey, read the small print, keep the packaging.
So just before my machine broke I did manage to whip up a few cool things. I made a reusable sandwich wrap with some oil cloth fabric I had. Here is the tutorial that I found on Pinterest from smashed peas and carrots
Its so very cute, I want to make a whole lunch set in matching fabric.
And since the machine is broken it's been all about the hand sewing. I whipped up this cute little phone cover:
Works in Progress
The hexagon patchwork is coming along very well. I drew up a schematic for how it was all going to be laid out
Then I laid it all out and taped it together:
I have now started sewing together the flower shapes into the rows then sewing the rows together. It's going to be a long process but totally worth it in the end.
I have also started knitting a top by purlbee. I was going to buy some merino yarn to make it but thankfully managed to save myself some money by getting a cotton jumper at a charity shop for 99p and ripping it out, so now I have some lovely cotton yarn to knit with.
Much Love
Maggie
Saturday, 2 June 2012
Cloud Amigurumi Pattern
Hello All,
I thought in order to celebrate this lovely bank holiday I would post a new pattern, This has been waiting in the wings for a while and I am glad to finally unleash it on the public.
May I introduce to you; My Amigurumi Clouds:
To make these cute little clouds you will need:
5mm safety eyes
double knit or worsted weight yarn in your chosen cloud colours
3.5mm hook
black embroidery floss and needle
fibre fill
and a stitch marker
Cloud
Beginning at the bottom of the cloud working in a continuous spiral
Chain 11
R1: sc in 2nd ch from hook, sc in next 9, 3 sc in last chain, work along other side of foundation chain, sc in next 8, 2 sc in last stitch.
R2: inc in first st, sc in next 8, inc in each of the next 3, sc in next 8, inc in last 2. (28 sc)
R3: sc in first, inc in next, sc in next 8, inc, sc, inc,sc, inc, sc in next 9, inc, sc inc, sc (34sc)
R4-7: sc around (34 sc)
R8: dec in first 2, sc in next 9, dec 4 times, sc in next 9, dec 2 times (26 sc)
R9:dec in first 2, sc in next 6, dec 3 times, sc in next 8, dec. (20sc)
R10-11: sc around (20sc)
R12: sc in first 3, dec in next, rep around (17sc)
R13: sc in first 2, dec in next, rep around
Add eyes and embroider mouth
R14: sc in first, dec in next, rep around
Stuff
R15: dec around untill closed make a chain to desired length if you with then FO.
Rain Drop
R1: 6sc in ring
R2: sc around increasing twice anywhere you wish (8sc)
R3: sc around
R4: dec, sc around (7sc)
R5: sc around decreasing twice anywhere you wish (5sc)
R6: dec once, sc around, slip stitch to close, make a chain to desired length and attach to cloud
Lightning
Ch 5 leave tail to sew.
R1: sc in 2nd chain from hook and in each chain, ch 1, turn (4sc)
R2:-3: sc across, ch1 turn (4sc)
R4: sc across, chain 3, turn
R5: sc in 2nd chain from hook and in next chain and all stitches across, ch1, turn (6sc)
R6: sc across, ch 1, turn (6sc)
R7: sc in next 4, ch 1 turn (4sc)
R8: dec in first, sc in next 2, ch 1, turn (3sc)
R9: sc across, ch 1, turn
R10: dec in first, sc, ch 1, turn (2sc)
R11: dec, ch 2, slip stitch in stitch you just decreased, slip stitch around the edges to tidy up doing 3 slip stitches to turn corners. FO attach to cloud.
Enjoy your new crochet weather system
Subscribe to:
Posts (Atom)